Hi Tim,
Where is the 3rd screw at? I found the two allen screws on the lead screw, not a third. When I unscrewed those two the carriage did drop free from the motor.
I will run a job later today with the g64 code removed and let you know how it goes.
Thanks,
-Eric
Pocket Depths
Moderators: ddw, al wolford, sbk, Bob, Kayvon
Re: Pocket Depths
Thanks,
-Eric
Facebook.com/inspireddesignstx
-Eric
Facebook.com/inspireddesignstx
Re: Pocket Depths
Hi Tim,
My tap file starts out like such:
G90
G20
F200.0
G64 P.1
S 2000
M3
I removed the G64 P.1 line from it and had the same results as before. Here are a couple screencaps to show what it looked like:
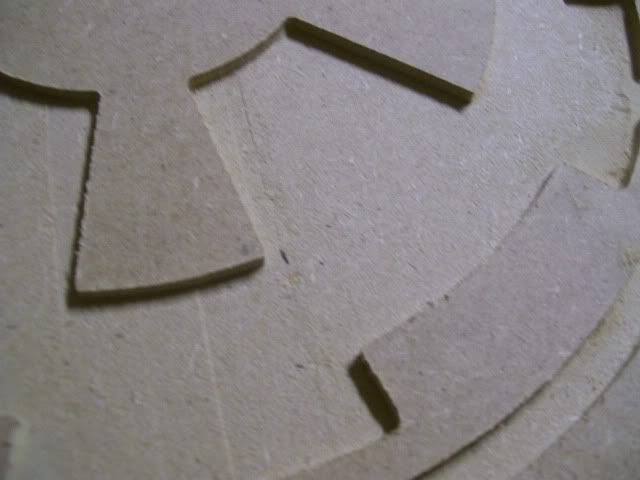
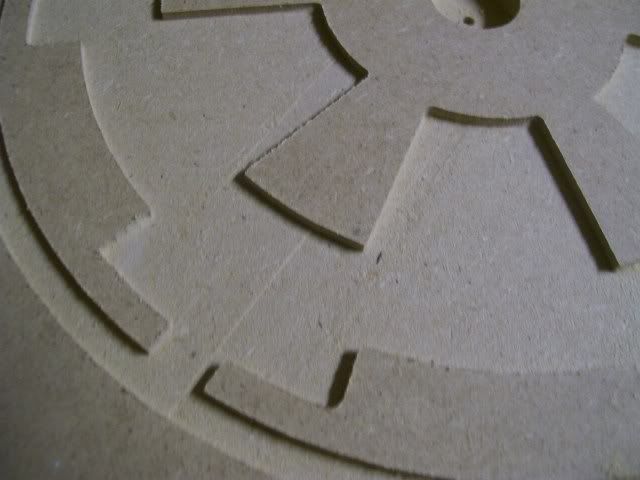
This is a 10" diameter using an 1/8" end mill.
-Eric
My tap file starts out like such:
G90
G20
F200.0
G64 P.1
S 2000
M3
I removed the G64 P.1 line from it and had the same results as before. Here are a couple screencaps to show what it looked like:
This is a 10" diameter using an 1/8" end mill.
-Eric
Thanks,
-Eric
Facebook.com/inspireddesignstx
-Eric
Facebook.com/inspireddesignstx
Re: Pocket Depths
Eric,
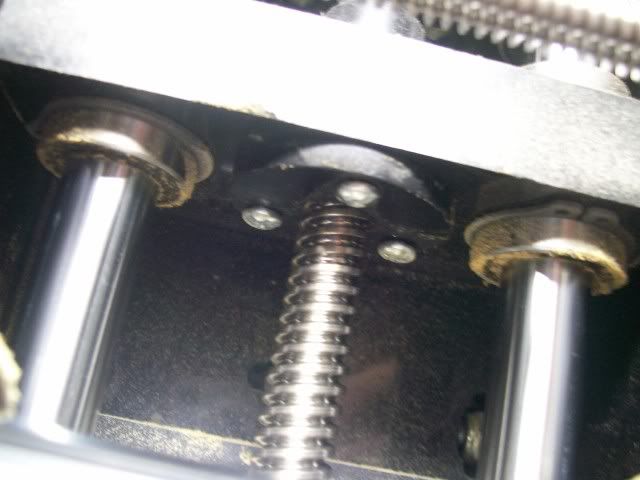
I am not talking about the coupler to the lead screw and the motor. I am refering to the leadscrew nut that is connected to the Z and allows it to travel up and down. it is black plastic and it is attached from the botom.
The second is I see you have F200 for transverse speed what is the speed you are running your cut? I would suggest you might want to slow that down a but F150 rapids and see how this goes.
Thanks
Tim
Re: Pocket Depths
Hi Tim,
I pulled the back of the gantry off. These screws are loose. You can tell by the picture. I took most of the carriage assembly apart to get to the front screw, but they are all tightened now.
I am running another sample to see how that improves things.
Also, I have run this job at 150 and at 100 and the results did not change. Hoping the screws were the fix.
-Eric
Last edited by hdtheater on Fri May 06, 2011 10:36 pm, edited 2 times in total.
Thanks,
-Eric
Facebook.com/inspireddesignstx
-Eric
Facebook.com/inspireddesignstx
Re: Pocket Depths
I did a test tonight and the job went smoothly! I am going to run a few more tomorrow and will report on their success.
-Eric
-Eric
Thanks,
-Eric
Facebook.com/inspireddesignstx
-Eric
Facebook.com/inspireddesignstx
Re: Pocket Depths
I ran two jobs today and the issues returned. Could the nut for the z have worked loose again? The screws are just tap screws. There are no nuts or anything else on them. Could the hdpe be stripped out? I can try some more jobs if need be. Would like to know suggestions if a modification to the design is needed.
-Eric
-Eric
Thanks,
-Eric
Facebook.com/inspireddesignstx
-Eric
Facebook.com/inspireddesignstx
Re: Pocket Depths
Running off the suggestion from Joe (jeb2cav), I drilled out the tap screws on my z axis and used the #8 bolts and tightened them down nice and tight. I ran a few jobs today and they are all working as they should!!
I should note that I had to pull the Shark apart twice to get it working. The first time I had them snug tight and the issue was still there, but not as bad. After pulling it apart the second time I tightened the bolts as tight as they could go without over torquing them. I have since run three jobs that constantly gave me fits and they all came out perfectly!
Thanks to all that worked with me to get this resolved.
-Eric
Thanks,
-Eric
Facebook.com/inspireddesignstx
-Eric
Facebook.com/inspireddesignstx